TIPS FOR PHOTOGRAPHING YOUR PET FOR A WATERCOLOR PORTRAIT BY JANET
 Many people have asked how I manage to take such good photographs of their dogs. Over the years I have developed techniques that work most of the time on most dogs. In the paragraphs below I will outline some important guidelines that you will want to follow if you wish to take close-up photos of your own dog. For purposes of simplicity, I write "dog" during this article but of course you know this applies to cats, horses, and even people (... although I doubt that the use of treats or the leash or the "sit" command would have the same effect on people. Then again, maybe the treats might ...)
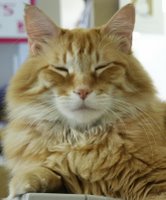
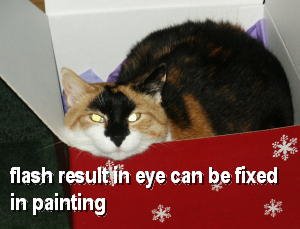
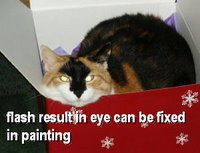 Now, after I have said all that, I will add this: sometimes you need to use flash anyway. In the case of the calico cat in the red box (left), it's not so bad! The only bad feature is the reflection in the eyes. I can fix that in my painting.
I encourage you to send me whatever photos you have.* I'll look at them all and I will let you know if I can do a good painting from them or not.
Now, after I have said all that, I will add this: sometimes you need to use flash anyway. In the case of the calico cat in the red box (left), it's not so bad! The only bad feature is the reflection in the eyes. I can fix that in my painting.
I encourage you to send me whatever photos you have.* I'll look at them all and I will let you know if I can do a good painting from them or not.
*If you plan to send me digital photos, please email me or call me first. Some picture files are really huge these days, and email does not always accommodate them easily. If you know how to do it, please reduce photos to about 300 pixels wide before emailing them.
AVOID SUNNY LOCATIONS; SHOOT IN BRIGHT SHADE OR ON CLOUDY DAYS
SUMMARY
Use a telephoto lens.
Stand back from your subject.
Try to have the subject fill as much of the frame as possible.
Don't use flash.
Choose a bright overcast day or wait til the sun goes behind a cloud. Or work within the solid shade of a building.
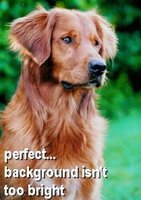
Choose an evenly-lit background that isn't too bright.
Be patient.
Take lots of exposures.
Be patient.
And be patient again.
COPYRIGHT OF PHOTOS
I prefer to work from photos that you have taken yourself. If the photos are taken by someone else, I'll ask that you get the photographer to sign a release so that I may freely paint from the photos. I will not use the photos for any purpose other than as a resource for my painting. ______________________________________________________
« back
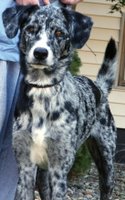
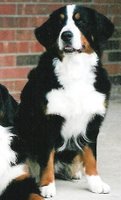
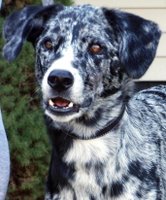
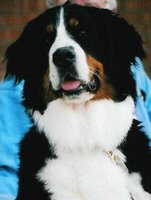
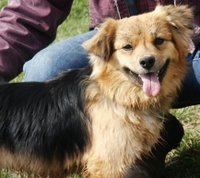
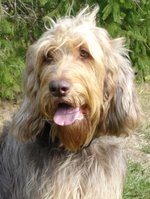
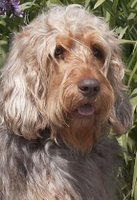
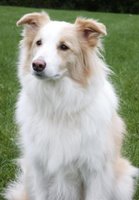
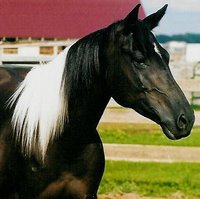
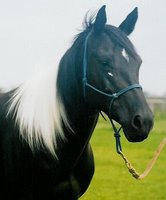
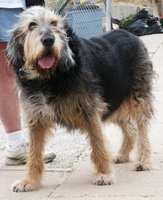
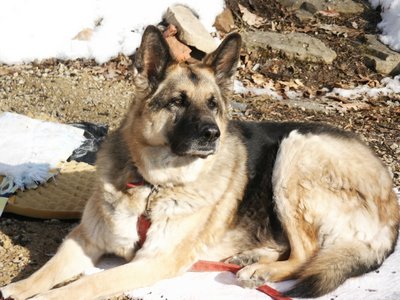
Here are the sorts of photographs that are perfect for me to paint from (but I would want you to have them enlarged to a 5x7 or 8x10 glossy print for me to work from):


top of page >
Back to Commissioned Portraits, Page 1 »
 Many people have asked how I manage to take such good photographs of their dogs. Over the years I have developed techniques that work most of the time on most dogs. In the paragraphs below I will outline some important guidelines that you will want to follow if you wish to take close-up photos of your own dog. For purposes of simplicity, I write "dog" during this article but of course you know this applies to cats, horses, and even people (... although I doubt that the use of treats or the leash or the "sit" command would have the same effect on people. Then again, maybe the treats might ...)
CAMERA AND LENSES
My descriptions below are based on using an old-fashioned camera with conventional film (I wrote this a long time ago). The principles will be similar with most digital cameras.
Try to use a telephoto or zoom feature on your camera, which is the feature that lets you zoom in on your subject from further away so that your subject fills more of the picture frame.
Using the telephoto lens feature on your camera is preferable for several reasons. With a telephoto lens, you can be 10 or 20 feet away from your dog and, by zooming in, you will still have the dog’s head and shoulders fill much of the frame. At these distances, your dog will be more comfortable and natural--and he won’t lick your lens!
Some animals are afraid of cameras, so a telephoto or zoom allows you to be further away.
Some animals are afraid of cameras, so a telephoto or zoom allows you to be further away.
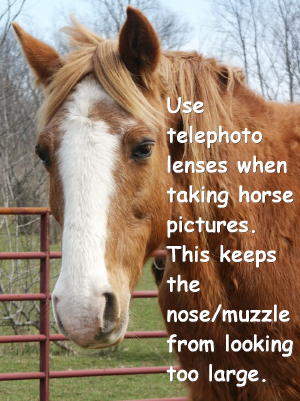
Another reason to try to use a telephoto or zoom feature is that telephoto lenses actually have a slimming effect on the subject. Professional portrait photographers know this…it’s not by chance that an 80mm lens is called a “portrait lens.”
(Some old point-and-shoot cameras don't offer the telephoto-length lens option that we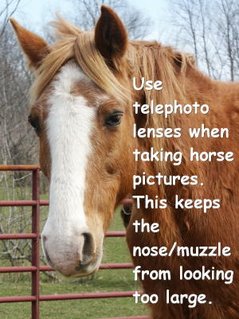 want--they only offer wide-angle, shorter-lens options. In this case, don't try to make the dog fill most of the picture, because you will be standing too close to your subject and you'll get that huge nose that we don't want. Instead, you'll need to stand at maybe 5-7 feet away, which means the dog will be taking up a smaller portion of the photograph than I would like. Detail may suffer, but that's probably better than a distorted face caused by being too close. Confused? Me, too. Now you can see why a telephoto-length or zoom lens is best.)
 want--they only offer wide-angle, shorter-lens options. In this case, don't try to make the dog fill most of the picture, because you will be standing too close to your subject and you'll get that huge nose that we don't want. Instead, you'll need to stand at maybe 5-7 feet away, which means the dog will be taking up a smaller portion of the photograph than I would like. Detail may suffer, but that's probably better than a distorted face caused by being too close. Confused? Me, too. Now you can see why a telephoto-length or zoom lens is best.)
Be aware that autofocus cameras usually have a 1/2-second delay of the shutter, during which time you may lose that fleeting expression in your dog which was so appealing. This is not ideal, yet I have gotten some very good photographs with my little autofocus digital zoom camera. But do be aware that in any situation, you may need to shoot a hundred shots to get a few really good ones.
LOCATION
Location can be important if you plan to use your photos for other reasons 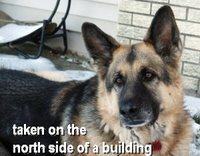 later, but backgrounds are not important when it comes to using the photos as references for my paintings. However, choose a background that is not too bright because it can confuse your camera’s metering system. Look for simple backgrounds without too many brightly-lit objects which can also confuse the camera’s light metering system. Worst-case scenario: placing the dog in front of a sunlit white wall, because that confuses the camera's meter system. Best-case scenario: placing the dog in front of a north-facing wall.
 later, but backgrounds are not important when it comes to using the photos as references for my paintings. However, choose a background that is not too bright because it can confuse your camera’s metering system. Look for simple backgrounds without too many brightly-lit objects which can also confuse the camera’s light metering system. Worst-case scenario: placing the dog in front of a sunlit white wall, because that confuses the camera's meter system. Best-case scenario: placing the dog in front of a north-facing wall.
LIGHTING
Lighting will be the most important factor in your dog’s photograph. After all, the very word PHOTOGRAPH means “record of light.” Lighting is especially important with dark/black dogs and dogs with dark eye areas. Most of your dog’s expression is in his eyes, and they should be tenderly recorded on the photograph. Don’t use flash! This is true for all animals—especially dark ones. Yes, you are thinking, “If my dog is black, don’t I need to use flash to brighten him up?” Actually, the light from a flash is too harsh and it will make the glossy coat of your dog look too shiny. The bright areas will be too bright and the dark areas will have no definition in them. Cameras are unable to accommodate all the light and dark values that electronic flash produces, and you will end up with a slick, shiny mass of fur with red eyes that will be difficult if not impossible for the artist to paint from.
 Now, after I have said all that, I will add this: sometimes you need to use flash anyway. In the case of the calico cat in the red box (left), it's not so bad! The only bad feature is the reflection in the eyes. I can fix that in my painting.
*If you plan to send me digital photos, please email me or call me first. Some picture files are really huge these days, and email does not always accommodate them easily. If you know how to do it, please reduce photos to about 300 pixels wide before emailing them.
Believe it or not, positioning your dog in the sun is one of the WORST things you can do, photographically-speaking. At full strength, sunlight can be just as bad as flash. And your dog will likely be squinting. So, try to take pictures on a bright-but-cloudy day instead.
The animal photographer loves bright but overcast days! Wait for the clouds to block out the sun, or shoot your pictures in the shade of a building. Under these conditions the light is much more even and you won’t get the harsh brights and dark darks that make detail in photos difficult to see.
WHERE AND HOW TO STAND
When taking the photos, squat down to the level of the dog. This may even require the photographer to lie down. You want your dog to look straight ahead (or off in the distance)---not upwards at you, so you get down to his level. You can have someone hold a small dog or cat in their arms or on their lap, being careful not to distort the pet’s neck or shoulders with the pressure of their hands. (It helps to take collars off when possible). Move in as closely as you can in order to fill the photo frame with your dog’s head, neck and shoulders.
GETTING THE POSE YOU WANT
This can be the hardest part. You will have the most success taking good pictures if you have a helper.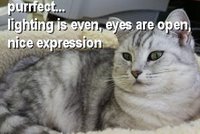 The helper can either take the photos or hold the dog. If your dog is obedience-trained, put him in a sit/stay. This keeps the dog from darting allover the place, and the photographer can keep the camera in focus. If the dog isn’t obedience trained, then ask your helper to hold the dog in one place on a leash or on your helper’s lap. If your dog is restrained with a leash and collar, watch for any extreme pulling so that you don’t get a distorted neck in the photo. Without a helper, you might just try tying the dog to a tree or post, and then wait for him to settle down.
 The helper can either take the photos or hold the dog. If your dog is obedience-trained, put him in a sit/stay. This keeps the dog from darting allover the place, and the photographer can keep the camera in focus. If the dog isn’t obedience trained, then ask your helper to hold the dog in one place on a leash or on your helper’s lap. If your dog is restrained with a leash and collar, watch for any extreme pulling so that you don’t get a distorted neck in the photo. Without a helper, you might just try tying the dog to a tree or post, and then wait for him to settle down.
Waiting to settle down is an important trick. The most important point from here on is PATIENCE. Your photo session may take quite some time. At the very beginning he may be a little too excited. Let your dog settle a while. Don’t bombard your dog with all sorts of stimuli at once. Take your time. This may take a half hour.
To get the dog’s attention, you can try a variety of things, but be sure to let him settle between attempts. If the dog is trained, he will stay, and will probably provide the photographer with a good expression. Disappear behind the corner of a building or car or tree. Make a funny noise. Or try knocking on the side of a building like someone knocking on a door. Or shake a food bag. What about a favorite squeaky toy or a whistle? If your dog has a favorite phrase such as “where’s the squirrel” or “wanna go for a walk?” use it gently,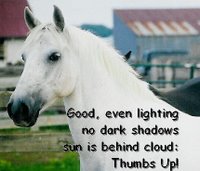 knowing that your dog may overreact. There is a balance between your dog being very interested (good) and being overly excited (not good).
 knowing that your dog may overreact. There is a balance between your dog being very interested (good) and being overly excited (not good).
Try throwing a stick, keys, or toy about 20 feet away behind the photographer. Try it behind to the left, behind to the right, and straight behind. The goal here is to have the dog looking a little bit in the distance. If the attraction is too close, then the dog will be looking up too much or down too much. If your dog baits well with food, then hold the bait at your waist level or knee level and stand back from your dog about 5 feet, so that the squatting photographer will have a good picture of a dog looking FORWARD, not up or down.
You have permission to act like a total idiot, trying to get a good expression, BUT IF YOU SAY YOUR DOG’S NAME TO GET HIS ATTENTION, HE WILL INVARIABLY AND GLEEFULLY COME TO YOU. You will have to start all over! Sometimes, simply waiting for the dog to look at a bird overhead or a passing bicyclist or someone walking their dog across the street can provide excellent photographic opportunities. Again, the dog often needs to be settled before these subtle events become exciting enough to elicit his attention.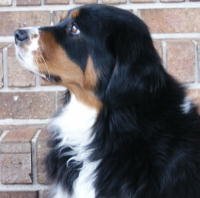

You may need to take a break or try again some other day. Don’t be surprised if you have to take 75 to 100 exposures just to get a few really good ones.
These have been guidelines and suggestions. You may need to break the rules and use a flash at an indoor dog show. Or you may have to take some photos in the sun at an obedience trial or agility event. But don't fret too much; believe it or not, luck and persistence are two major factors in successful pet photography.SUMMARY
Use a telephoto lens.
Stand back from your subject.
Try to have the subject fill as much of the frame as possible.
Don't use flash.
Choose a bright overcast day or wait til the sun goes behind a cloud. Or work within the solid shade of a building.
Choose an evenly-lit background that isn't too bright.
Be patient.
Take lots of exposures.
Be patient.
And be patient again.
COPYRIGHT OF PHOTOS
I prefer to work from photos that you have taken yourself. If the photos are taken by someone else, I'll ask that you get the photographer to sign a release so that I may freely paint from the photos. I will not use the photos for any purpose other than as a resource for my painting. ______________________________________________________
« back
Here are the sorts of photographs that are perfect for me to paint from (but I would want you to have them enlarged to a 5x7 or 8x10 glossy print for me to work from):
top of page >
Back to Commissioned Portraits, Page 1 »
____________________________________________________________
Janet L. Wissmann, Watercolorist
« home page
____________________________________________________________
« home page
____________________________________________________________
